How I use storytelling to explain what I get paid to do

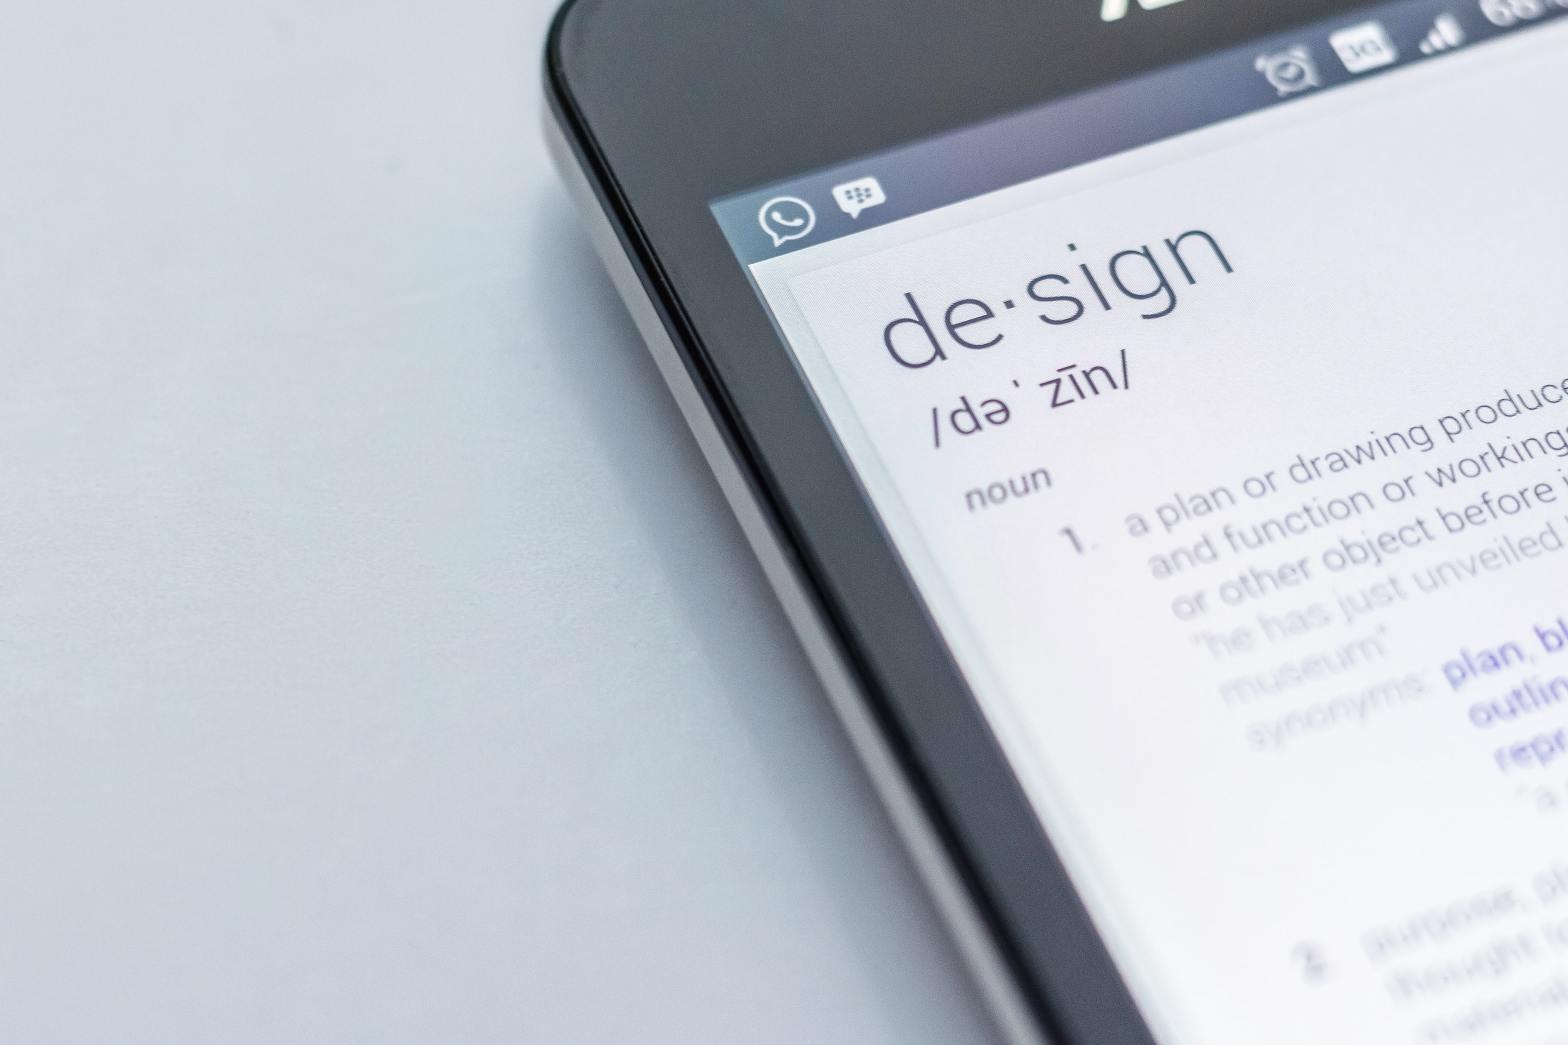
Content design is a new-ish field. I say that because it hasn’t really been showing up in job searches until more recently, like pre-pandemic times.

It’s not one of those common jobs that most people have heard of: account manager, marketing coordinator, engineer, developer, and the lot. Most people have a sense of what people in these roles do, or at least know some of their job responsibilities. 

But when it comes to content design…not so much. When I tell people this is my job title, the reaction I get is a lot of polite smiles and nods with a glazed look in their eyes.

So I’ve tried to change my approach, and have used some of these descriptive sentences:

  • “I work with UI/UX professionals on words in their designs”
  • “I am responsible for all of the words in an interface”
  • “I’m in user interface and user experience design, and specifically, I help out with the words.”
  • “I help the user respond to the system”
  • “I write the copy you see on the screens”

And unfortunately, none of these land with the audience. So I’m back to where I started.

Through all of these trials and tribulations, I’ve realized that I can’t just describe what I do. I need to use a story. Stories are universal, and they help set the stage by showing and telling.

So instead I become a storyteller to describe what I do when I sit down at my computer, sip my coffee, and dive into Figma files and Sharepoint sites.

I end up telling the same familiar story

I have one particular story that I tell over and over again. And I use this particular story because it:

  • has a low-barrier to entry
  • is common and relatable
  • ties into people’s emotions 

The story goes a little something like this:

Okay, so do you know how you usually log into your favorite app or website? When you open it up, you may get a screen or two that asks you to log in with your user name and password, along with some other brand-specific information.

All of the words you see on the screen are my responsibility. I’m the person who helps write the labels for the fields, like “username” and “password.”

But what if you’ve never had an account, so you need to create one? I’m also person who writes the the series of screens to help you create a new account.

Or maybe you’ve been here before, but it takes a little while to get you to your home page with personal preferences? I’m the person who writes the message on the loading screen.

And I’m also that person who helps you when you can’t log in. You try to log in and then you get stopped, and you’re frustrated because you don’t know if its because of your username, password, internet connection, app update, or anything else. I’m the person who writes, “Hey, looks like you’re no longer connected to the internet. Check your connection before logging in again.”

And the words you see as soon as you’re logged in are my responsibility, too.

This story is something everyone can relate to…they’ve been there before. So it helps everyone can better understand what I do on a day to day basis. It also keeps me from getting into the weeds about my work, like discussing ampersands or the use of the Oxford comma (yes, I believe in it and we use it).

Storytelling is what content designers do

It’s interesting that I start with a story, because a lot of what I do as a content designer is revolves around storytelling (how meta). I use stories to talk about points of friction for users. I use stories to talk about collaboration. And I use stories to make connections.

My content design team has a bunch of really good storytellers. We’re able to set the stage, provide the context, and lead everyone on a journey—all while putting our own personal flair on it.

And its not just oral storytelling. Stories come in different formats: PowerPoint slideshows, Miro boards, Figma frames, sticky notes, and more.

As a team, we have been able to do a lot with storytelling:

  • We crafted a presentation that allowed us to tell a story about content designers and what happens when you work with them
  • We told stories about complex problems we faced during our team working sessions
  • We talked about how content designers could get more embedded into teams — how we could do it, and how we could empower our design partners to be more inclusive
  • We talked about our success stories with our design partners
  • We had a team book club and read “Storytelling for User Experience”

Now you’re probably like, “All of this sounds great, but what does it really mean?”

This art of storytelling has allowed us to not only explain our jobs, but also do our jobs. It’s kind of like our hidden superpower. That, and asking questions, but that’s for another post.

So next time you’re stuck on how to tell someone what you do as a content designer, remember to use your superpower. And be thankful it didn’t take a spider bite or a radioactive substance to give it to you.

Why the style guide is a content designer’s best friend

A lot of us have best friends outside of work. And if you’re lucky enough, you may have even have some friends at work too. But not a lot of us look to style guides as our best friends.

But as a content designer, the style guide is one of our most trusted and reliable friends. It’s always there, (definitely pinned to my browser toolbar) and always provides the answers to I need to content queries when I’m stuck.

When all else seems up in the air, I know I can rely on the style guide to point me in the right direction.

What’s a style guide?

So you’re probably asking what a style guide is, and how it might be different from the familiar style guides (like AP Style Guide and Chicago Style Manual) that contain all of the grammar rules and formatting styles that most major publications follow.

A style guide within a company is the same, but more catered toward what the company represents and how it presents itself (referenced as the “brand,” which is a much bigger discussion). It’s a set of rules to follow based on the type of content you’re writing (and for who), which closely mirrors the company’s branding and principles.

To steal a quote from one of the mainstays in the writing world, Grammarly says that a style guide is, “a document that contains rules and guidelines for a company.”

What’s included in a style guide?

Style guides can contain a lot of rules related to the written word, including:

  • A word list (from A-Z)
  • Voice and tone guidelines (who is saying it and how they say it)
  • Jargon and company terms (when to use or avoid it)
  • Formatting (bold, italics, underlines, etc.)
  • Accessibility (rules for how to make copy inclusive)
  • UI component guidelines (creating copy for certain components in a design)
  • Patterns (how content is written for repeated scenarios, like failing to log in to a site)

All of these things might seem trivial on the surface, but they play a key role in creating copy for a company. That’s because they ensure that all copy (whether marketing, product, or documentation) sounds the same despite the fact that different writers are writing it.

Imagine an entire writing department going rogue and writing whatever they wanted, however they wanted, because they thought their way was the best way. Sounds dangerous. A brand style guide can wrangle all of these writers in.

Looks like writers mostly use it. So how do content designers use the style guide?

Content designers adhere to the style guide because we want to make sure we’re all speaking the same language as we work. We want to make sure that what we’re providing in product (whether that be microcopy, error messages, or additional information) syncs up across all screens and products.

If we were super conversational in one product, but very direct and informative in another, that could definitely cause some confusion with a customer.

We also look to the style guide for familiar patterns. Oftentimes, content will follow a specific pattern, and we can reuse these patterns to stay consistent and help us work faster. We’re not trying to come up with new ways to solve a problem that already has a solution.

Why should I live by my brand style guide?

Anyone who is writing or working with content should know the power of their brand style guide.

Now it sounds extreme, but as a content designer the brand style guide is my best friend at work (sorry other actual people friends).

Content designers should live and breathe the brand style guide because:

  • It is a source of truth that can be pointed back to, with rules vetted by the content design team
  • It helps get things done, faster
  • It’s a place to send people for their content questions
  • It creates consistency across the copy, and consistency = familiarity = trust

A brand style guide contains all of the things that you will need to rely on as you make content decisions moving forward.

How do we label buttons for confirmation modals? What do we say in banner alerts? Do we use italicized formatting or no? All of these things can be answered with the style guide.

A style guide ensures that you and your team align on the same language used throughout each product so that everything sounds the same. Otherwise, it’ll sound like a bunch of different writers trying to mesh things together.

How to create your style guide

Everyone has different models for creating style guides, and honestly my ways have been a bit haphazard (a sort of “add as you grow” mentality).

I would suggest the following process for creating a style guide:

  1. Create an outline – plan out the sections and what they should include
  2. Create the content – describe in plain language the what, when, why, and how
  3. Capture examples – live examples or mockups can help add context
  4. Fill it out and vet it with the team – its important that everyone is on board with the rules

Additionally, here are some tips to consider when you create a style guide:

  1. Keep notes on terminology as you design — you’ll find yourself forgetting what certain terms mean in a certain context or to a specific experience if you don’t
  2. Record reusable content patterns to help other team members create content — templatize the content, explain the parts, and mention how it can be adjusted
  3. Capture design decisions you made, and why — for instance, why an email is preferred over an alert for a scenario
  4. Record how standard flows work (like a log in flow) — this way, every product can have the same standard interactions

The style guide may get manipulated

Remember that each project uses different language and designs, so it can be difficult to align every single project with rigid style guide decisions.

However, you can still align each project to the basics of the style guide, but bend them slightly. That way, the core principles are aligned but you still have the ability to manipulate them slightly based on different use cases.

To help keep track of these different changes, consider creating individual project style guides to supplement the main style guide. These help any new content designers (and other design partners) understand how to create content for a specific product.

Additionally, consider revisiting your style guide every now and then to check it and make revisions. You’ll likely not get it right on the first (or fifth) pass, and there are always new scenarios that challenge the established rules.

Stay true to the style guide

Now this might seem like a lot of words dedicated to something that seems like a dusty, inflexible document. But truth be told the style guide is an important artifact, and an often-used tool in the content designer’s toolkit.

Remember to always use the style guide as your foundation; and if you don’t have one, actively create one to give yourself some solid ground to stand on. It will save you a lot of time, effort, and difficult discussions.

UX toolkit: modals

Imagine this: you’re starting to browse a new shop online, then all of a sudden a window pops up and stops you.

“Sign up with our mailing list and get 15% off!” Sounds like a pretty good deal, so you enter your email in the box and click Submit. And you go back to doing what you were doing, hoping for a sweet coupon to show up in your inbox…

Have you ever stopped to think what the hell that window is? Is it an annoying pop up? Or something with more structure than the flashy, Java-powered pop-ups of the early internet?

Truth be told, they’re an important UI element in the content designer’s toolkit. And we call them modals.

What’s a modal?

A modal can go by other names: pop-up, flyout, dialog window (and any other name you can pull from every other design system). But they all do the same thing: interrupt a user’s workflow with important information that needs a decision from them.

Modals are an important element in UX design. They jump into the user’s central line of sight, disables all content behind it, and forces them to make a choice before continuing.

Though they may be disruptive, but they’re actually very important in helping the user make decisions. That’s because they halt the user in their steps to deliver important information. It’s similar to a construction worker holding up a “Stop” sign to halt them from continuing on that road (because there may be workers taking a lunch break ahead).

What’s in a modal?

Modals have a few distinct pieces to them:

  • The title: asks a question, tells the user what they have to do, or gives them some information they should know
  • The copy: tells them some additional information that might be pertinent to the title
  • The buttons: let’s the user take an action (like responding to the question in a title)
  • The X button: let’s the user close out of the modal and cancel (seriously, don’t forget this otherwise you’ll have some pretty upset users and an inaccessible modal)

When should I use a modal?

Knowing when to use a modal can be difficult. Honestly, it’s a loaded question, but here are some instances where you might want to use one:

  • When a user needs to confirm something
  • When a user is deleting something without an “undo” option
  • When a user is trying to leave without saving
  • When a user can sign in to populate data
  • When a user is adding something new to their workflow
  • When a user is deleting something with massive implications to other things
  • When the user may have unknowingly done something that affects the output
  • When the user should be reminded of important information

This certainly isn’t an exhaustive list. And sometimes, a modal isn’t the right component after all.

What are some other options instead of a modal?

Here are some other UI elements you can consider in place of a modal:

  • Alert: banner message that passively lets the user know something has happened
  • Toast: a time-constrained message that lets the user know an action has occurred
  • Error message: appears under a specific field to let the user know their input doesn’t meet the set standards (let’s not say invalid, please)
  • Badge: small visual indicator that shows the user something has changed (like in a user menu)
  • Email: if it REALLY doesn’t matter to the user’s current process (but you still want to inform them) then maybe send them an email

And you certainly shouldn’t get yourself in a situation where a modal appears on top of a modal. Then you’re getting into some type of inception…

This is only a brief introduction to modals

You’ll likely start noticing them all over the place. And while they’re a key part of a design system, i’ll leave you with a word of caution: don’t get modal-happy and start plastering them everywhere like Banksys.

How to come up with fresh content ideas

The internet is full of content. And its not just words: there are infographics, videos, reviews, slideshows, surveys…the list of content types is seemingly endless.

And let’s just go ahead and say it: there’s content for everything on the internet. Any niche hobby or interest has at least some content swirling about on a random site, forum, or YouTube channel.

However, not all of this content is current (or even relevant). There are a lot of stale articles that are holding on despite being published years ago.

This is why Google has been factoring in “content freshness” when it returns search results on a search engine results page (SERP).

What is “content freshness?”

Content freshness refers to content that was either posted or updated recently. Not only will this be a recently published piece, but it will also use the latest statistics and link to other fresh content.

When folks talk about freshness, you’ll likely hear the term “evergreen” pop up. Evergreen content is content that is always relevant, no matter how old it gets. These are often how-to articles (like how to tie a tie), recipes, and other content that doesn’t age or change much over time.

Evergreen articles may not be fresh, but their timeless factor gives them a huge boost in the search rankings (and updating them with new data wouldn’t hurt).

So why is it important that content is “fresh?”

Google loves seeing fresh content on sites. So first and foremost, you should publish posts over time and not in one big batch to keep your freshness factor fresh.

This “freshness” factor is used by Google uses to rank a particular page on the SERP. You may already know some of the other ranking factors, including:

  • Relevance
  • Helpfulness
  • Length
  • Keywords
  • Backlinks
  • Page structure
  • Page speed
  • Mobile-friendliness

For sake of space, I’m not going to list them all here, but feel free to check out all of Google’s ranking factors in this post from Brian Dean at Backlinko.

How you can come up with new content ideas

At times, coming up with new content ideas can be downright challenging. You feel like you’ve hit a wall and covered every topic and every angle possible. But guess what? There’s a treasure trove of content ideas out there just waiting to be explored.

A lot of people have asked (albeit, not directly), so here are all the different ways that I like to come up with new content ideas:

  • Google autocorrect: Start typing a search query into the box and see what comes up as suggestions
  • Google’s “People also ask” box: Check out the block on the page labeled “People also ask,” where other similar questions appear
  • Answer The Public: Find related keywords and see what people are asking on the internet
  • Reddit forums: Browse the communities (also called “subreddits”) to see what people are posting or asking
  • Comment threads: Look at trending blog posts or articles and see what people are writing in the comments section
  • Your competition: No harm in borrowing like an artist 😉

Keep it fresh when you can

Fresh content is a great way to show that you are actively participating in the discussion (whatever that may be) and have more than just a splash page. It shows that you’re regularly providing new words and ideas to circulate on the web.

But you don’t have to create brand new content from scratch. Consider revisiting some of your older content that is getting plenty of traffic and adding new stats, quotes, or backlinks before updating the publishing date. Remember, updating content that has been performing well will only help its rankings — or at least help it hold its position on the page.

Now take some of these ideas and create your new content (or at least give that old post a facelift).

Content design is also designing

When I tell people I’m a content designer, the first thing they ask is what I do. And I tell them that I’m the guy who works on the words in the interface of a product or application.

That button label? That’s me. That error message that tells you why that password doesn’t work? That’s me too. And the help text that appears after you select an info icon next to an unfamiliar term? Also me.

Every piece of content you see in an interface is something I can impact. But while I focus on (and love working with) words, I want to make one thing clear: I’m not just a words person. I also help with the design.

I’m a designer just like the rest of ’em

-me, most of the time

Wait, you’re not just working on the words?

The term “content” comes with a reputation that its only the words you see in a particular experience. A lot of people initially think about marketing copy or SEO. But despite the fact that “content” is in my job title, I do more than just touch all the words on a page or in a flow. I also design.

My contributions to the design process

There are many activities I’m involved with throughout the design process that use words and design thinking. Here are just a few of my favorites:

User journeys

One thing I really like doing is working with a team on creating a user journey. During a working sessions, we address three things:

  • User need (what the user wants to do)
  • Story point (how we help the user get what they want)
  • Outcome (what the user does/knows/feels after)

These help create an outline for a particular page or flow. As a team, we can reference this storyline to find out how put together a design that helps the user along on their journey.

User research

I don’t have a lot of experience leading user research sessions, but I like participating in them. It affords me an opportunity to see what users are thinking and what they expect from a design or flow.

Hearing, “I don’t know what to do next” or “The documentation for this is the world’s worst” helps me understand where we can improve the design. It provides insights into where users could benefit from contextual help and what users need at a specific point in time.

Wireframing

I’ll be the first to admit that I’m not a visual designer. I’m not going to know what a good color palette is or how to create a custom illustration for an empty state.

But what I can do is put together a lot of boxes, lines, and text to make some wireframes in Figma or Miro (and maybe even borrow some library components). I enjoy wireframing because I can use information hierarchy to lay out the content for a particular page or frame in a flow. It reminds me to always put the most important information first, and to always make the next action clear.

Creating patterns

In my current role, I was initially tasked to work on component documentation as part of our design system. This exposure to components reaffirmed that having consistent, familiar patterns in place can create uniformity across products and tooling. And uniformity = familiarity = trust.

That’s why content patterns are also important: these reusable formulas can be used to add content into a design that is familiar and parallel to the content that exists in the design. They use rationale to explain what each piece of content means, and why it should be written in a particular way (formatting, voice and tone, punctuation, etc.).

In a nutshell: content design is designing

Content design is so much more than placing words on a page ad-hoc or retrofitting content into a design. While working with words is part of the job, so are things like creating user journeys, participating in user research, and sketching out wireframes.

Just because us content designers work with words, doesn’t mean we should be limited to just working with words 🙂

The Importance of Co-Designing

Oftentimes, a design or prototype ends up in the hands of a content design team and is introduced with these infamous words:

“Can you help me with just the words right here?”

-a lot of designers

It’s a bit frustrating to hear this — because frankly, content design isn’t only about making the words better. And it’s not like we can just look at one area, because we instinctually look at everything. And sure, we help with the right words, but our job isn’t just the words.

There’s a lot of things that content design has a hand in, and designing is one of them. That’s why I urge any and all designers I work with to let me get in on the design sessions as early and as often as possible.

I want to get into these early sessions because it allows me to co-design.

What’s co-designing?

Let me borrow a definition before sharing my own:

Co-design workshops help designers partner with users to include their perspective in knowledge development, idea generation, and product development.

UX Magazine

But to me, “co-designing” means getting your hands dirty, ideating and working through the tough problems together. It’s a chance to affect the design from the get-go, not getting something handed to you and telling you to “make it better with words.”

What are some co-designing examples?

I’ve recently had the opportunity to co-design on some projects and wanted to share some of the them here:

  • We hosted a working session to discuss what information was critical to surface at what point
  • We talked through what the user would want to know in an onboarding flow prior to designing it
  • We discussed the terminology and what words could be confusing (for users and employees)
  • We structured the “About” page to deliver the most important information in a friendly, digestible way
  • We created a tour within a modal to introduce a new component designing tool
  • We took feedback from research discussions with customers and changed flows to better suit what users are accustomed to

What was really fun and enjoyable about all of these experiences is being able to see the progression of the designs along the way. I got to see what discussions, user research, and feedback helped shape them into their final products.

Seeing this was not only a cool experience, but it also proved to me that careful, informed iterations over time can help create some really cool designs. And that’s because its not just something created on instinct — it’s created after considering a lot of information and perspectives.

Co-designing sounds great. But how do I get involved in it?

Co-designing isn’t something that you’re just given and it all magically works. As a content person, I’ve had to fight for my seat at the table more than often.

To do this, you have to show them that you work with more than just the words. Show them other skills like research, storyboarding, wireframing, and other important tasks, you can establish yourself as a true collaborative partner who doesn’t just “do words.”

Some things I’ve done to co-design with others include:

  • Setting up time to workshop or brainstorm on designs
  • Sharing interesting research I found (or even did myself)
  • Spinning up hypothesized user journeys framed by potential user questions
  • Starting wireframes with a content-first approach
  • Invite myself to meetings (sometimes a bit aggressively)
  • Work in the same tools that designers prefer (lately it has been Miro and Figma)

But once you’re co-designing, it all feels seamless

You’ll know when you’ve finally hit the co-designing sweet spot. You get asked to participate in research discussions. People want to pick your brain about specific applications of a component. Your help is requested on the correct type of flow for a certain task. It all feels integrated and collaborative.

It’s not going to happen overnight, and its not going to happen on every project. Some designers are more protective about their work and want to run the show. And that’s okay, so long as you tried.

Just know that you have every right to be at the same table as the designers, researchers, and other members of the team. Content isn’t an added-on service, its also a design discipline.

What ten months in a content design role has taught me

It’s been an very interesting transition into UX writing, coming from a few jobs where long-form copy (complete with a minimum word count) was the norm. But I’m so happy I’ve made the change because it has allowed me to shift my perspective on words and how just a few simple words can have a huge impact.

Now what exactly is a UX writer?

Glad you asked.

If you asked a majority of people what a UX writer is or what they do, you’d probably get a lot of blank stares. That’s because UX writing is a fairly new field that is still establishing itself, fighting for a spot at the table next to the technical writers and marketing writers.

To be totally transparent, I had only a vague understanding of what a UX writer (or Content Designer, which is what we’re called at the company I currently work for) actually does while searching for these roles. One time in San Francisco, I was interviewed for a contract role at Western Union, where I would “write the labels for the forms and mobile experience.” This was my introduction to UX writing, and back then it sounded like a snoozefest to be creating form labels and input fields for a money wiring service.

This is why my initial grasp of what a UX writer does was solely writing text for buttons and labels on a website — and I was dead wrong.

Content Designers definitely write the button text to help users transition between screens. But they’re also responsible for:

  • Updating all microcopy — including error messages, empty states, success messages, toasts, and more
  • Choosing the right component — whether a message should show in an alert, modal, or tooltip
  • Understanding the flow of the site and each user interaction
  • Establishing the voice of the site, and flexing tone effectively
  • And, most importantly, being an advocate for the end-user by showing empathy

That’s a lot to unpack! And its only a part of what I’ve learned now that I’m ten months in at my company. So what I wanted to do was share a few other lessons I’ve learned along the way.

Here’s what I’ve learned as a Content Designer

And I’m sure this isn’t limited to just my experience 🙂

You have to insert yourself into the design process.

Sometimes there are teams that aren’t used to having a person on the team who actively cares about the words and the experience. So you have to get in there and make yourself known.

If a designer is starting on a wireframe, volunteer to help and set up a working session with them. If something requires content, ask to be involved. Always look for places where words come into play and take the opportunity.

You work with the designers in their tools.

Word documents are the bread and butter of copy docs (along with some very specific instructions on what copy goes where).

But you also have to work with designers where they are. This includes Sketch, InVision, and Abstract. Updating minor copy in these tools can help get copy changes in faster, without the need for creating a copy doc for everything. But copy docs always have their place in the process.

You work cross-functionally with all sorts of teams.

Content Designers get a lot of face-time with everyone on the team. One moment you could be working with designers on the user flow for a particular process, and then you’re in a meeting with stakeholders discussing the goals of the home page. Then you’re sitting with the developers and are understanding how to meet their needs as they turn designs into working prototypes.

While this requires a bit of a juggling act, it expands your vision across the project and helps you see things wholistically.

But working cross functionally means you get to work with a lot of talented people.

Working as a Content Designer, I’m always impressed by the amount of knowledge and insight that my coworkers have into different processes and designs. It’s really rewarding to work alongside people who also want the projects, product, or website to be the best for the end user.

You have to be collaborative.

With so many designs, copy docs, and concepts getting thrown around, you have to know how to work with all sorts of personalities and people. But this collaboration is important because it brings a lot of different ideas and perspectives to the table — in turn, creating something that is inclusive of many different types of users.

You have to give (and get) honest feedback.

When you’re working together to achieve a goal, open and honest feedback is crucial. Everyone is respectful of others, but they also know when to push back on and idea and explain why it might not be the best approach.

This type of candid, real feedback is something that feels a bit harsh from the get-go, but its important for two reasons:

  1. You get better at your craft
  2. The project gets better with everyone’s input

You help establish the terminology and taxonomy for a project.

Because you’re “the person in charge of words,” it means you’ll be in charge of defining those words and making sure they’re used purposefully within the experience. Creating a word list and adding it to the project’s style guide is a great way to ensure everyone aligns on the same terms.

You’re the one getting content in before lorem ipsum sneaks its way into designs.

Oftentimes, a designer will work on making a great-looking layout and design a space for some text. They’re thinking, “Text goes here. A writer can fill this space in!” But that makes it challenging to work.

First, you have to fit content into a space, which already puts restrictions on what you can do. What if the space isn’t enough for what the content needs to say. Or worse, what if its too much?

Second, this approach makes it difficult to do content-first design. Content-first design is telling the story with words — all before wireframes or designs enter the mix. Designing with words first lets you ask yourself, “As a user, what would I want to know about on this screen or page?”

You’re in charge of a lot of content — like, a lot.

Buttons, modal titles, navigation items, terminology, helper text, placeholder text, error states, empty states, error messages, information icons, tooltips…this list goes on and on.

tldr: There’s a lot of content on the Content Designer’s plate.

You have to be flexible.

As someone who cares about words, it can be difficult when designers and stakeholders don’t agree with your word choices or how you want to show those words on the screen (is it an alert message? a modal? help text?). Being a Content Designer teaches you to be flexible, and makes you realize how important it is to pick your battles.

Being a content designer may seem like a lot to handle, but its very rewarding work.

In these first ten months, I’ve learned so much about the world of content design and how a content design team operates. Every member of my team has different strengths, and its very invigorating to see how all of these strong points help establish content as an industry necessity.

In our effort to add and refine copy throughout the user experience, we’re helping to make products more usable and understandable to the end users. And that alone is a really cool outcome of our work.

UX toolkit: buttons

As someone who is newer to UX writing, I realized it would be cool to share what I’ve learned about UI elements and the words to add into them. So I’m starting a series that discusses some of the most basic UI elements and what kind of UX text to write and format within them.

This is the first one in the series, so please send me any feedback about what would be helpful to you!

Let’s start off with one of the core elements everyone is familiar with: a button.

What’s a button?

A button is an element that performs an user-initiated action.

One of the best descriptions I’ve heard is that buttons “are the way a user converses with the experience.”

We’ve all used buttons (both in desktop and mobile experiences) — whether we’re saving a draft of a WordPress post, adding an item to our cart, or calculating a quote on car insurance.

What should a button look like?

A button should look like a button — make it look like the user can select it. Imagine a button element on an arcade game. That’s how obvious the button should be.

You can accomplish this “clickable” look on buttons by adding dropshadow or an interaction on hover (like adding a border). You want it to look something different from surrounding elements.

Consider using rounded corners over sharp corners on your buttons because users perceive rounded corners as softer and more “friendly.”

Image credit: onTrendwebsites

Where should you use a button?

As frequent users of websites and mobile apps, most of us are familiar where buttons appear:

  • Navigation
  • Toolbars
  • Sidebars
  • Cards
  • Modals
  • Alerts
  • Forms

Always place a button where a user wants to (or should) take an action.

You’re probably familiar with buttons like “Add to Cart” in a shopping experience, or the “Publish” button on a WordPress post.

Wordpress toolbar buttons
There’s a “Publish” button right here in my WordPress post

When should you use a button?

These buttons help the user take action on something in the experience. Provide them for any type of action, even something as trivial as “Cancel.”

However, the style of button you use will differ depending on the importance of the action. The most important action on the page should always be the most prominent button on the page — use a bold color or style to make it stand out.

What kind of text should you use in a button?

Remember that buttons are a way that the user “speaks” to the experience. Therefore, button text should always be an action verb.

Also keep button text short and succinct, either one or two words in length. If you’re using two words, I suggest using title-case (the first letter of each word is capitalized). My suggestion is only based on a personal opinion — your company’s style guide (or even your own beliefs) may say otherwise.

Those are the button basics! Hopefully you’ve learned a few things from this post, and I hope you’ll turn in for future posts on UX tool kit basics. And as always, thanks for learning along with me.

The Importance Of Long-Tail Keywords For Better SEO Rankings

Why You Shouldn’t Ignore Long-Tail Keywords

You’re not going to rank for the most popular keyword in your industry.

It’s a hard reality to face as soon as you start up your own website. You’ve got dreams of appearing alongside the big dogs on the first page of Google. But the competition is fierce, and with a brand new domain and little credibility, its going to be awfully tough (albeit near impossible) to rank on page one for keywords.

So how do you even make a mark in your industry when all the good keywords are seemingly taken? Long-tail keywords.

The following post will explain what a long-tail keyword is, how to find them, and why they’re important for your SEO strategy.

What’s a long-tail keyword?

Long tail keywords are more specific and less common than other keywords. They focus more on a niche.

Yoast

Essentially we’re looking at four to five words that make up a specific search query.

Keyword: blue jeans

Long-tail keyword: Levis skinny fit blue jeans

Long-tail keywords are the best way to start ranking on Google. Instead of chasing down the more popular keywords, you can identify long-tail keywords. Approximately 70 percent of searches on Google are long-tail keywords.

How do you find long-tail keywords?

There are a number of places you can go on the internet to uncover long-tail keywords:

  • Use a free tool like Ubersuggest to find keyword ideas.
  • Plug a base keyword into AnswerThePublic to find out what questions people are asking in your industry.
  • Search on Google and use the autocomplete function to see what’s popular.
  • Also check out the “People also ask” section on a Google search results page to see what else people want to know.
  • Browse industry topics on Quora to see what types of questions people are asking.
  • Search industry-specific hashtags on Twitter.
  • Visit your competitor’s site and see what they’re talking about.

Go after the long-tail keywords that are less competitive.

You must start by finding keywords with low competition. Once you are winning in that arena, you can slowly move up to higher competition keywords. Often those are also high search volume keywords.

Alexa

Long-tail keywords can help you achieve better rankings because they’re less competitive.

Think of it like this: you’ve got a better chance of ranking for “craft beer tasting notes” than just a keyword like “craft beer.” Older and more authoritative domains like BeerAdvocate and RateBeer are going to overshadow you in a second if you target such a generic keyword. But these sites aren’t focused on those niche long-tail keywords, which is where you can shine.

How do you judge their competitiveness? By identifying their keyword difficulty, often abbreviated KD.

You can find out KD specifics by using SEO research tools like Ahrefs, Ubersuggest, and SEMRush. You’ll want to go after the keywords with a KD between 20 and 66, with a Search Volume between 1,000 and 100,000. This will focus your efforts on key

Long-tail keywords are the secret sauce for SEO success.

[Long-tail keywords] are the foundation of an effective SEO strategy.

Neil Patel

A good keyword strategy is the foundation of your on-page SEO efforts because it shapes the content you write. Without a list of quality keywords, you’re dead in the water. You’ll be writing without a focus. That’s doing a disservice to your business and your audience.


HTML Basics: What’s A NoFollow Tag And When Do You Use It?

The “nofollow” HTML attribute plays an important role for backlinks.

Backlinks are an important part of ranking well on Google.

Google introduced PageRank in 1998. This algorithm showed that Google was placing a huge emphasis on backlinks as a ranking factor. And because of this, irrelevant backlinks started to appear in every corner of the internet.

People were finding all sorts of places to put links to their site that could easily earn them backlinks. Two of the easiest locations were in blog comments or forums, which were chock full of meaningless links.

This created a huge uptick in spam comments across the web, particularly on high-ranking sites like . Many of these sites weren’t vouching for the credibility of these links, yet here they were stealing their link juice through link spam. It wasn’t fair — so Google did something about it by introducing the “nofollow” tag.

What’s a nofollow tag?

“nofollow” is an HTML attribute that is added to a link, telling Google not to pass along link juice to the page.

It looks like this in the code:

<a href=”https://www.somewebsite.com/” rel=”nofollow”>ANCHOR TEXT</a>

When would you use a nofollow tag?

Here are some particular cases where you would add a “nofollow” tag to links on your site:

  • To the comments section of a site, preventing users from spamming with irrelevant backlinks
  • To a paid advertisement or link
  • To links in a press release
  • To links that point to untrusted content
  • To log in/sign up buttons or links

WordPress adds “nofollow” tags to any links in the comments section of a site. Reddit also uses “nofollow” on links, but actually removes this attribution once something makes it to the front page.

Most social platforms also “nofollow” any links included in a post.

You can identify whether or not a link is nofollow by either installing a Chrome plugin or by searching for “nofollow” in the page source code.

Do nofollow tags have any SEO benefit?

Both “nofollow” and “followed” links affect SEO.

In Google’s eyes, the more “followed” links to a page, the more important and credible that site must be. That’s why incorporating a backlink strategy as part of your SEO efforts is important — other sites certify your worth.

On the contrary “nofollow” links have no SEO benefits. When this attribute is added to a link, it means you’re not vouching for the page. You’re not aiding in increasing that site’s PageRank.

“Nofollow” links are an important way of keeping link spam under control on the internet. They keep poor quality websites from gaining better search visibility through shady backlink tactics. Don’t freely apply the “nofollow” attribute to any and all links — use them with a specific intent in mind.